Beginner's Guide to AI Image Generation: From Text to Image Creation
Have you ever tried generating images with AI, only to get results that look nothing like what you wanted? In fact, AI image generation is just like text conversations — the key lies in how you "talk" to it. This article teaches you step-by-step how to generate high-quality images with AI from scratch, with no design background required.
What Is AI Image Generation?
In simple terms, you describe a scene in words, and AI draws it for you. This process is called "Text-to-Image" and is currently one of the most popular forms of AI creation.
Common AI image generation tools include:
- Midjourney: Highest image quality, richest styles, ideal for artistic users
- DALL-E 3: Made by OpenAI, strong comprehension, great for realistic styles
- Stable Diffusion: Open-source and free, locally deployable, maximum flexibility
- Tongyi Wanxiang: By Alibaba, excellent Chinese comprehension, generous free tier
- Wenxin Yige: By Baidu, friendly to Chinese prompts
Step 1: Learn to Write Prompts
A prompt is the "drawing instruction" you give to AI. How well you write it directly determines the image quality.
Quality Prompt Formula
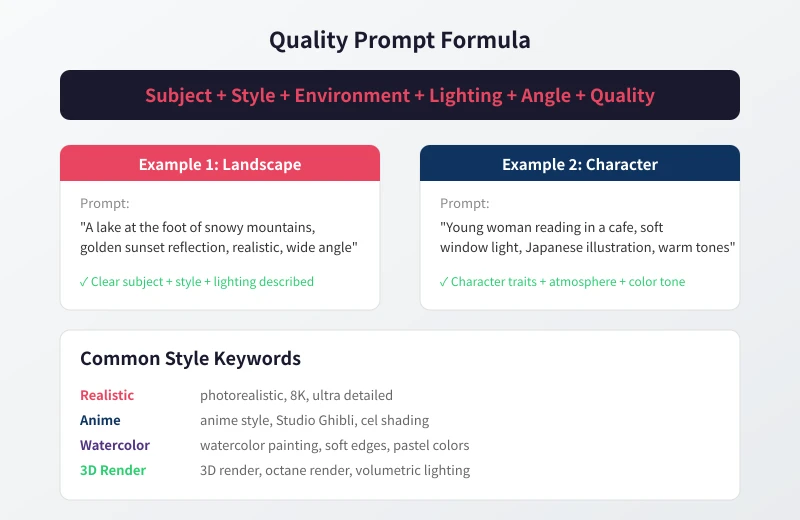
A handy universal formula: Subject + Style + Environment + Lighting + Perspective + Quality
For example:
- Bad prompt: "A cat" — too vague, AI can only guess randomly
- Good prompt: "An orange cat sitting on a windowsill watching the sunset, soft warm lighting, photorealistic style, 8K quality" — specific and vivid
Step 2: Choose an Image Style
Style determines the overall look and feel of the image. Here are common styles and their keywords:
- Realistic: photorealistic, 8K, ultra detailed, hyper realistic
- Anime: anime style, Studio Ghibli, cel shading, manga
- Watercolor: watercolor painting, soft edges, pastel colors
- Oil Painting: oil painting, impasto, classical, Renaissance
- 3D Render: 3D render, octane render, volumetric lighting
- Pixel Art: pixel art, 16-bit, retro game
- Flat Illustration: flat illustration, vector art, minimalist
Step 3: Specify Image Parameters
Beyond content and style, you can also control these details:
Aspect Ratio
- 16:9 (Landscape): Great for cover images, desktop wallpapers, article illustrations
- 1:1 (Square): Ideal for social media avatars, Instagram posts
- 9:16 (Portrait): Perfect for phone wallpapers, short video covers, Xiaohongshu
- 3:2: Closest to camera photo ratio, most natural
Other Adjustable Parameters
- Color Tone: warm tones, cool tones, muted colors
- Lighting: golden hour, soft lighting, dramatic lighting
- Perspective: bird's eye view, close-up, wide angle
Step 4: Iterate and Refine
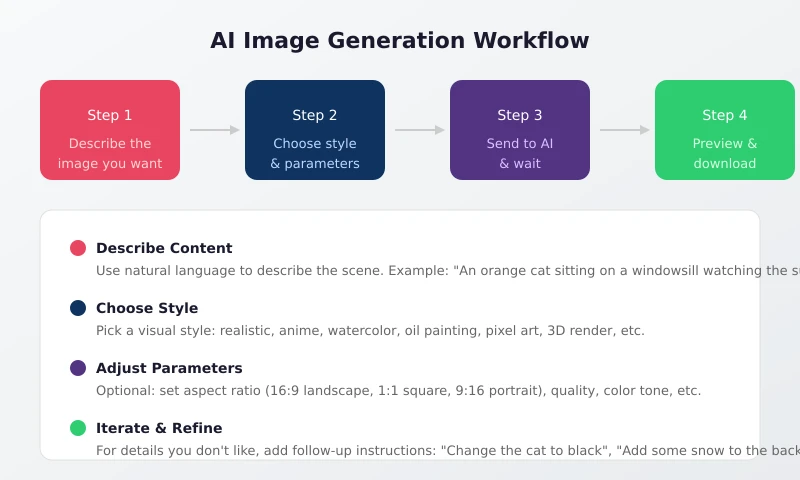
The first generation is rarely perfect — that's normal. The key is learning to "fine-tune":
- Subject not right: Add details — "change the cat to a black dog"
- Background wrong: Specify background — "change background to a snowy scene"
- Style off: Emphasize style — "more realistic, less cartoonish"
- Composition poor: Specify perspective — "switch to bird's eye view"
Change only one variable at a time so you can pinpoint issues precisely. Changing too many things at once makes results uncontrollable.
Practical Example: Creating a Poster from Scratch
Suppose you need to create a promotional poster for a coffee shop event. Here are the steps:
- Define requirements: Coffee shop, autumn/winter theme, cozy atmosphere
- Write the first prompt: "A latte on a wooden table, with cinnamon and dried flowers beside it, autumn/winter atmosphere, warm tones, photorealistic style"
- Choose aspect ratio: Portrait 9:16 (suitable for posters)
- Generate and evaluate: Check if the overall feel is right
- Fine-tune: "Add some warm sunlight from the window" / "Place an open book on the table"
- Finalize: Download the high-resolution version once satisfied
Frequently Asked Questions
Q: Should I use Chinese or English prompts?
Most models currently understand English better. If you're not proficient in English, you can describe in Chinese first, then have AI translate it into an English prompt. Domestic tools (Tongyi Wanxiang, Wenxin Yige) have better support for Chinese prompts.
Q: What if the generated image has text in it?
AI text rendering is still unstable and often produces garbled characters. If you need text on an image, it's recommended to generate a text-free base image first, then add text manually using design tools like Canva.
Q: Can I use generated images commercially?
It depends on the tool and subscription plan you use. Midjourney's paid version allows commercial use, but the free version does not. Images generated by DALL-E 3 are owned by the user. Please check each platform's terms of use before proceeding.
Q: How do I avoid images looking too "AI-generated"?
Several tips: specify a concrete style (don't just say "beautiful"), add imperfect elements ("natural lighting" instead of "perfect lighting"), and reference the style of real photographers or painters.
Ready-to-Use Prompt Templates
Copy and use directly — just replace the content in brackets:
- Product showcase: [Product name] on a [material] surface, studio lighting, white background, commercial photography, 8K
- Social media illustration: [Scene description], vibrant colors, trendy aesthetic, Instagram style, [style] illustration
- Avatar generation: portrait of [person description], [style] style, soft lighting, detailed face, high quality
- Landscape wallpaper: [Location] landscape, [time] lighting, breathtaking view, ultra wide, 4K wallpaper
Conclusion
The core of AI image generation comes down to three words: be specific. The more detailed your description, the closer AI's results will be to what you envision. Remember this formula: Subject + Style + Environment + Lighting + Perspective + Quality. With a little practice, you'll get the hang of it.
You don't need to know how to draw, you don't need to understand design — as long as you can "describe things," you can create stunning images with AI. Open any AI image generation tool and start with your very first prompt today.
Related Articles
AI-Powered PPT Presentations: Complete Guide from Outline to Layout
Creating PPTs with AI tools is as easy as having a conversation. This tutorial teaches you step-by-step how to generate professional presentations in three steps, with tool comparisons and prompt templates for beginners.
TutorialsAI Resume Writing Guide: Generate a Professional Resume in 3 Steps
Learn how to use AI to quickly generate professional resumes for fresh graduates, career changers, and career upgraders. Includes practical prompt templates, beginner-friendly.
TutorialsFamily Meal Planning with AI: Your Smart Assistant for Menu Design & Nutrition
Learn to use AI tools for weekly meal planning — from menu design to nutrition audits and shopping lists. A complete beginner-friendly guide with ready-to-use prompt templates.
Comments are not yet available, stay tuned