AI Image Editing Guide: Remove Backgrounds, Fix Flaws, and Change Styles in 3 Steps

What Is AI Image Editing?
Traditional image editing requires learning Photoshop, understanding layers, and mastering cutout techniques — a high barrier to entry. AI image editing is completely different: you just tell the AI "remove the background" or "convert this photo to an oil painting style," and the AI completes it automatically with results rivaling professional designers.
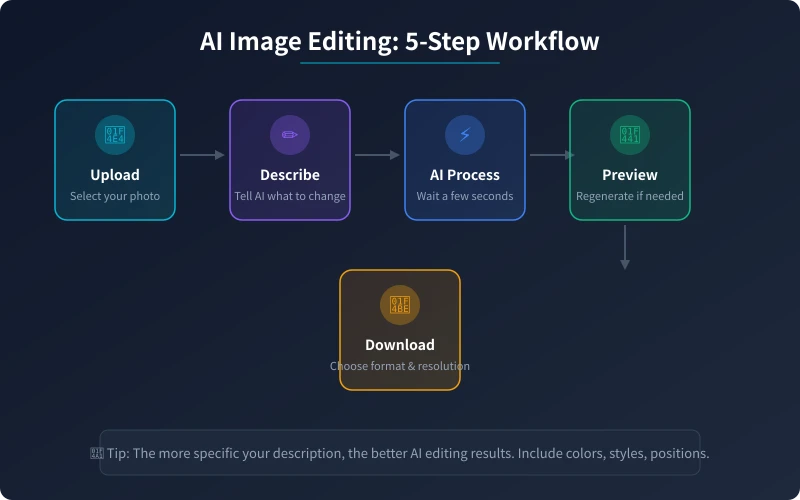
This article teaches you to use common AI tools to complete various image editing tasks in three steps. No design background needed — just follow along.
Recommended AI Image Editing Tools
Based on different editing needs, here are the top recommended tools:
ChatGPT (GPT-4o)
- The most versatile AI image editing tool, supporting conversational editing
- Upload images directly and describe changes in natural language
- Supports background removal, style changes, adding elements, color adjustments, and more
- Free tier has usage limits; Plus users get unlimited access
Remove.bg
- Specializes in background removal with the best results and fastest speed
- Automatically removes backgrounds after uploading — no manual operation needed
- Free version offers standard resolution downloads; HD requires payment
- Ideal for e-commerce product photos, ID photos, and profile pictures
Meitu Xiuxiu / Xingtu
- China's most popular mobile photo editing apps with increasingly powerful AI features
- Supports one-click beautification, blemish removal, background replacement, and style transfer
- Easiest to use, perfect for everyday photo editing
- Basic features are free
Canva AI
- Online design platform with built-in AI image editing features
- Supports background removal, image enhancement, and magic eraser
- Great for posters, social media graphics, and presentation visuals
- Free tier offers plenty of features
Adobe Firefly
- Professional-grade AI image editing from Adobe
- Supports generative fill, image expansion, and style transfer
- Deep integration with Photoshop, ideal for professional users
- Requires an Adobe subscription
Task 1: Background Removal (Most Common)
Background removal is the most frequently used AI image editing feature, applicable to e-commerce product photos, ID photos, profile pictures, poster creation, and more.
Method 1: Using Remove.bg (Fastest)
Step 1: Open the remove.bg website
Step 2: Click "Upload Image" and select the photo you want to edit
Step 3: Wait 3-5 seconds for the AI to process automatically
Step 4: Click "Download" to save the transparent PNG image
The entire process takes less than 10 seconds with excellent results — even hair strands are precisely cut out.
Method 2: Using ChatGPT
Step 1: Open ChatGPT and upload the image you want to edit
Step 2: Enter the instruction: "Please remove the background from this image and make it transparent"
Step 3: Wait for the AI to process and preview the result
Step 4: If unsatisfied, continue with: "Make the hair edges more precise" or "Clean up the background more"
ChatGPT's advantage is that you can iteratively refine through conversation, achieving precise control over the results.
Task 2: Blemish Removal and Beautification
AI blemish removal can automatically eliminate acne, spots, wrinkles, and unwanted objects from photos with natural-looking results.
Using Meitu Xiuxiu
Step 1: Open the Meitu Xiuxiu app and import your photo
Step 2: Tap the "AI Beautify" feature
Step 3: Choose the beautification level (recommend "Natural" to avoid over-editing)
Step 4: For detailed retouching, use the "Acne Removal" tool to tap on blemish locations
Step 5: Save the image
Removing Unwanted Objects with ChatGPT
After uploading a photo, tell the AI: "Please remove the passerby in the background" or "Clean up the clutter on the table." The AI will automatically identify and remove the specified objects, naturally filling in with surrounding background.
Task 3: Style Transfer (Most Fun)
AI style transfer can convert your real photos into various artistic styles like oil painting, watercolor, anime, sketch, and more.
Using ChatGPT for Style Transfer
Step 1: Upload your photo
Step 2: Enter a style instruction, for example:
- "Convert this photo to Studio Ghibli animation style"
- "Make it cyberpunk style with neon lighting effects"
- "Convert to watercolor style with soft colors"
- "Make it vintage film style with grain texture"
Step 3: After the AI generates the result, preview it. Adjust the description and regenerate if needed.
Using Xingtu App
Step 1: Open the Xingtu app and import your photo
Step 2: Go to "AI Filters" or "Style Transfer" feature
Step 3: Choose a style template you like (anime, oil painting, sketch, etc.)
Step 4: Adjust the intensity and save the image
Task 4: Quality Enhancement and Upscaling
If your photo is blurry or low resolution, AI can intelligently enhance quality and upscale images with results far exceeding traditional methods.
Recommended Tools
- Bigjpg: Dedicated AI image upscaler, supports 2-4x enlargement without blurring
- Upscayl: Open-source free AI upscaler that runs locally
- Topaz Photo AI: Professional-grade AI enhancement tool with the best results but requires payment
Using Bigjpg
Step 1: Open the bigjpg.com website
Step 2: Upload your blurry or low-resolution image
Step 3: Select the enlargement factor (recommend 2x) and type (photo/illustration)
Step 4: Click "Start" and wait for processing to complete
Step 5: Download the high-definition image
Task 5: AI Outpainting and Generative Fill
AI outpainting can intelligently expand a small image to a larger size, automatically completing the missing parts. Generative fill lets you select an area and use AI to generate new content to replace it.
Outpainting with ChatGPT
After uploading an image, say: "Please expand this image to the right, completing the scenery on the right side." The AI will automatically generate content consistent with the original image's style.
Generative Fill with Adobe Firefly
Step 1: Open the image in Photoshop
Step 2: Use the selection tool to select the area you want to modify
Step 3: Click "Generative Fill" and enter a description (e.g., "blue sky with white clouds")
Step 4: The AI generates multiple options — choose the most satisfactory one
Practical Tips for Better AI Editing Results
Tip 1: Be Specific in Your Descriptions
Don't just say "remove background." Instead say "remove the background and replace it with a pure white background, keeping the subject edges sharp." The more specific your description, the better the AI understands.
Tip 2: Edit in Steps
For complex edits, don't try to do everything at once. First remove the background, then change the style, finally adjust colors. Step-by-step editing produces better results and is easier to control.
Tip 3: Original Image Quality Matters
AI editing results depend on original image quality. Use photos with good lighting, high clarity, and proper composition. Blurry or too-dark originals are difficult for AI to process well.
Tip 4: Generate Multiple Versions to Compare
AI produces different results each time. If the first result isn't satisfactory, regenerate — trying a few more times usually yields a result you're happy with.
Tip 5: Leverage Reference Images
Many AI tools support uploading reference images. You can tell the AI "edit following the style of this reference image" for more precise results.
Frequently Asked Questions
Q: Can AI-edited images be used commercially?
Most AI tools allow commercial use with paid plans; free versions are typically for personal use only. Check each tool's terms of use. Always verify licensing before commercial use.
Q: Is AI background removal better than Photoshop cutout?
For simple backgrounds (solid colors, gradients), AI results are equal to or better than Photoshop. For complex backgrounds (hair, transparent objects), professional designers may achieve more precise results with manual Photoshop cutouts, but AI can already meet 90% of everyday needs.
Q: Can I do AI image editing on my phone?
Absolutely. Meitu Xiuxiu, Xingtu, Snapseed, and other mobile apps have powerful AI editing features. For more professional results, you can access ChatGPT or Remove.bg through your mobile browser.
Q: Will AI editing leave visible traces?
High-quality AI editing is virtually undetectable. However, heavy editing (such as significantly altering faces or compositing different photos) may produce unnatural results. Always review details carefully after editing.
📖 Related Articles
AI Mobile Photography Assistant Practical Guide: Composition Tips, Scene Optimization, and Post-Processing All in One
Can't take good photos with your phone? This article teaches you how to use AI tools to handle composition, settings, and post-processing. From food to portraits, from daytime to night scenes, four scenarios broken down step by step. Even beginners can capture stunning photos that get likes on social media.
TutorialsAI Sleep Management Assistant: Track Sleep, Improve Routine, and Boost Sleep Quality
Struggling with sleep? This article shows you how to use AI tools to track sleep data, analyze sleep patterns, and create personalized improvement plans. From trouble falling asleep to waking up in the middle of the night, AI helps you find the root cause and continuously optimize—a sleep management guide that even beginners can use.
TutorialsAI Legal Assistant Guide: Contract Review, Rights Protection & Document Drafting Made Easy
Can't understand your lease? Don't know how to handle a workplace dispute? AI can help you review contracts, analyze legal issues, and draft legal documents. This guide covers three practical scenarios to turn AI into your personal legal advisor.
💬 Comments are not yet available, stay tuned